(714) 332-6302

What Separates a Good AC Installation from a Bad One (And Why It Matters More Than Your Equipment)
What separates a good AC installation from a bad one comes down to a handful of technical decisions made during setup — most of which are completely invisible once the job is done. Here’s a quick breakdown:
| Factor | Good Installation | Bad Installation |
|---|---|---|
| System sizing | Manual J load calculation | Square footage guesswork |
| Refrigerant charge | Measured with digital manifolds | Eyeballed or estimated |
| Ductwork | Sealed with mastic, balanced airflow | Taped loosely, leaking 20–30% of air |
| Vacuum procedure | Pulled to 500 microns, verified | Skipped or rushed |
| Drainage | Proper slope, float switch installed | Flat or backward, no safety switch |
| Thermostat placement | Interior wall, away from heat sources | Near windows, vents, or appliances |
| Documentation | Commissioning report provided | No records kept |
Most homeowners spend hours comparing brands and SEER ratings before buying a new system — and that research matters. But here’s what rarely gets enough attention: even a top-of-the-line AC unit will underperform, wear out faster, and cost you more to run if it isn’t installed correctly.
Think of it like a high-performance engine dropped into the wrong vehicle, with loose wires and the wrong fuel. The engine itself isn’t the problem. The setup is.
About 19% of central AC systems purchased between 2009 and 2024 ran into at least one problem — and nearly a quarter of those stopped working properly altogether. Many of those failures weren’t equipment defects. They were installation failures.
For homeowners in Anaheim, Irvine, Fullerton, and across Orange County, where summers push AC systems hard for months at a time, the quality of your installation isn’t just a technical detail. It’s the difference between a system that lasts 15 to 25 years and one that starts breaking down before year 10.
Sizing and Sizing Errors: What Separates a Good AC Installation from a Bad One
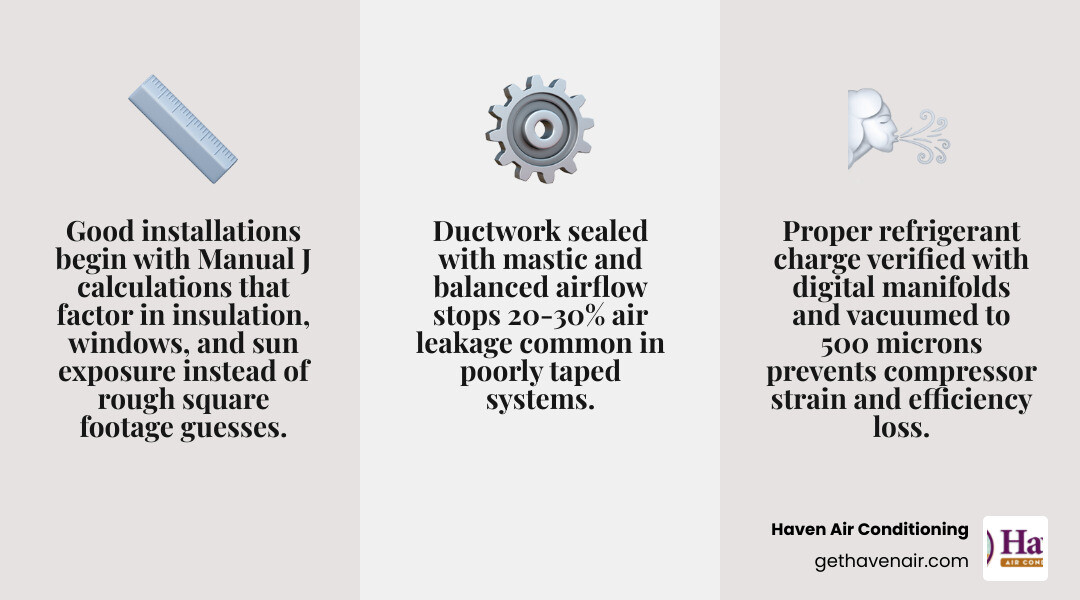
The foundation of any successful HVAC project begins long before the first tool is unpacked. It starts with a mathematical assessment called an ACCA Manual J load calculation. This scientific sizing method determines exactly how much cooling capacity your home needs by analyzing structural variables: insulation R-values, window surface areas, ceiling heights, home orientation to the sun, and the local microclimates of Southern California.
An amateur installer often relies on lazy “rules of thumb,” such as sizing a system solely based on square footage or simply matching the tonnage of your old, outdated unit. This shortcut is one of the most common installation mistakes, and it almost always leads to severe sizing errors.
If a system is oversized—which is incredibly common, with many bad installations resulting in systems 20% to 40% larger than necessary—it will cool the home too quickly. This triggers a destructive cycle known as short cycling. Because the system turns on and off rapidly, it never runs long enough to perform one of its most critical tasks: humidity control. In coastal or humid pocket areas of Orange County, this leaves your home feeling damp, sticky, and “clammy,” even if the thermostat says it is 72 degrees. Furthermore, short cycling places immense mechanical wear on the compressor, driving up your energy bills and drastically shortening the equipment’s lifespan.
Conversely, an undersized system will run continuously during a hot afternoon, struggling to reach your target temperature. This constant operation spikes your monthly energy bills and burns out the fan motor prematurely.
With the strict SEER2 efficiency standards in full effect, modern variable-speed and two-stage systems are designed to run longer, highly efficient cycles. If your system isn’t sized perfectly to your home’s unique layout, you won’t get the efficiency you paid for.
To make sure your home is fully prepared for this process, you can read our guide on Preparing Your Home for a New AC Installation. Proper preparation combined with an accurate load calculation ensures your new system is matched perfectly to your physical space. For more detailed spatial planning, check out our resources on Room Layout for New AC Installation and Room by Room Planning for AC Installation.
Technical Precision: Refrigerant Charge, Vacuuming, and Electrical Connections
A high-quality installation is defined by the technical steps a technician takes when connecting the indoor evaporator coil to the outdoor condenser unit. This requires absolute precision across three key areas: pulling a proper vacuum, securing electrical connections, and ensuring line set compatibility.
During the installation process, the refrigerant lines must be cleared of all air, nitrogen, and non-condensable moisture. A professional technician will use a dedicated digital micron gauge to pull a deep vacuum down to 500 microns or below and perform a decay test to ensure the system is completely sealed.
Amateur installers or handymen often skip or rush this step, failing to pull a proper vacuum. When moisture is left inside the lines, it reacts with the modern POE (polyolester) oils used in today’s environmentally friendly systems. This chemical reaction creates highly corrosive acids that eat away at the copper windings inside the compressor, inevitably causing a catastrophic compressor burnout within three to five years.
Additionally, electrical safety is paramount. High-voltage connections must be tight, secure, and properly sized with correct circuit breakers and whip gauges. Loose wiring causes micro-vibrations that can fry expensive control boards. If you are replacing an older system, technicians must also verify line set compatibility. Reusing an old, contaminated line set without a thorough chemical flush will ruin a brand-new system instantly. To ensure these highly technical steps are handled safely, it is vital to understand Why Hire Certified HVAC Technicians for your replacement project.
How Refrigerant Calibration Defines What Separates a Good AC Installation from a Bad One
Once the system is sealed and vacuumed, the refrigerant charge must be calibrated precisely. Modern air conditioners are incredibly sensitive to the amount of refrigerant flowing through their coils.
A professional installation team uses digital manifolds to measure the exact system pressures, calculating subcooling (for systems with thermal expansion valves) and superheat (for systems with fixed orifices). This is the only way to verify the charge is perfect.
A bad installation, on the other hand, often relies on outdated, subjective techniques like the “beer can cold” method—simply feeling the copper pipe to see if it feels cold. This guesswork is highly dangerous for modern equipment.
Even a minor refrigerant charge error of 5% can:
- Reduce overall system efficiency by double digits.
- Cause the evaporator coil to freeze up, completely blocking airflow.
- Force liquid refrigerant back into the compressor, causing instant mechanical failure.
- Place destructive, continuous strain on the compressor motor.
How Drainage and Thermostat Setup Show What Separates a Good AC Installation from a Bad One
The difference between an expert installation and a rushed job is also highly visible in the details of the condensate drainage and thermostat configuration.
As your AC cools your home, it pulls gallons of water out of the air daily. A good installation ensures the condensate drain line is pitched with a proper slope of at least 1/4 inch of drop per foot to allow gravity to carry the water away. It also includes a properly designed P-trap to prevent sewer gases from entering your home’s air supply, along with a secondary drain pan and an emergency condensate float switch. If the main drain line ever clogs, the float switch detects the rising water and safely shuts the system down before water overflows, preventing thousands of dollars in water damage to your ceilings or attic.
Thermostat placement is another invisible detail that dictates daily comfort. A professional will always place the thermostat on an interior wall in a central, neutral area of the home. A poor installation might leave the thermostat near a sunny window, close to a drafty door, or right next to a kitchen appliance. This leads to ghost readings—false temperature spikes that cause the system to cycle on and off incorrectly, wasting energy and creating uncomfortable temperature swings.
To help you visualize the entire timeline of these procedures, we have outlined the complete process in our guide on What to Expect During HVAC Installation as well as the technical Steps to an Expert HVAC Installation.
Airflow Dynamics: Ductwork Integrity and Static Pressure
You can buy the most efficient, expensive air conditioner on the market, but if your home’s ductwork is leaky, poorly sized, or falling apart, that efficiency is completely lost. Airflow dynamics are the unsung heroes of home comfort.
According to energy studies, leaky ductwork can waste 20% to 30% of cooled air before it ever reaches a room. In a bad installation, contractors often hook up a powerful new system to old, decaying ductwork without checking for leaks or structural integrity. They might secure connections with standard silver duct tape, which dries out, loses its adhesive properties, and fails completely within a couple of years.
A professional installation always includes meticulous duct sealing using a specialized, fiber-reinforced mastic sealant or high-grade foil tape. This creates a permanent, airtight bond that ensures 95% to 100% of your conditioned air actually reaches your living spaces.
| Sealing Method | Durability | Airtight Efficiency | Longevity |
|---|---|---|---|
| Professional Mastic Sealant | Permanent, flexible bond | 95% – 100% | Decades (does not degrade) |
| Standard Duct Tape | Fails quickly under heat | Drops to 70% – 80% | 1 – 3 years (adhesive dries out) |
Furthermore, a great installer will measure static pressure—the resistance to airflow within your duct system—using a digital manometer. If the ductwork is too restrictive or poorly balanced, it creates high static pressure. This chokes the system, causing weak airflow, noisy grilles, and hot spots in bedrooms. If your home lacks traditional ductwork entirely, there are still highly efficient options available. You can read about alternative cooling solutions in The Best Ways to Cool a House Without Existing Vents.
Protecting Your Investment: Warranties, Lifespan, and Maintenance
A new central air conditioning system is a significant home investment. A professionally installed and maintained system typically boasts an expected lifespan of 15 to 25 years. However, a bad installation can easily cut that lifespan in half, forcing a premature system replacement in 10 years or less due to constant component fatigue and mechanical stress.
Beyond daily energy waste and premature breakdown, a poor installation can directly threaten your manufacturer warranty. Most major HVAC manufacturers (such as Daikin, Lennox, and Goodman) explicitly state in their fine print that their 5- to 10-year parts warranties are only valid if the system is installed by a licensed, professional HVAC contractor according to strict factory specifications.
If a system fails because an amateur skipped the vacuum process, oversized the unit, or left the refrigerant undercharged, the manufacturer can—and often will—deny your warranty claim. A professional company protects your investment by providing a detailed commissioning report that documents all startup pressures, electrical draws, and temperatures, serving as official proof of a perfect installation.
Even after a flawless installation, ongoing care is necessary to preserve your system’s efficiency and warranty status. Regular, post-installation maintenance—such as changing air filters every 30 to 90 days, keeping the outdoor condenser clear of landscaping debris, and scheduling annual professional tune-ups—keeps your system running like new.
Choosing the right partner from day one is the most critical decision you will make. To understand how to vet your options, read our guide on Choosing Professional HVAC Installation.
Frequently Asked Questions about AC Installation Quality
How long should a properly installed AC unit last?
With a high-quality, professional installation and regular preventative maintenance, a central air conditioning system should easily last 15 to 25 years. When a system is installed poorly, the cumulative stress of short cycling, improper refrigerant levels, and high static pressure leads to severe component fatigue, often causing complete system failure in 10 years or less (typically between years 8 and 12).
Can a bad installation void my manufacturer warranty?
Yes, absolutely. Manufacturers require proof that the system was installed by a licensed, certified professional in strict accordance with local building codes and factory specifications. If a major component like the compressor fails and the manufacturer discovers the failure was caused by installation errors (such as moisture left in the lines or incorrect electrical wiring), they can deny your warranty claim, leaving you with a massive repair bill.
What are the warning signs of a poor AC installation?
Homeowners should watch out for several immediate red flags after a new installation:
- Uneven cooling or significant temperature differences between rooms.
- Unusually high utility bills that do not reflect your new system’s efficiency rating.
- Excessive noise, rattling, or vibrations coming from the indoor or outdoor units.
- Short cycling, where the AC turns on and off every few minutes.
- Water pooling near the indoor unit, indicating a poorly sloped drain line or a missing P-trap.
Conclusion
At the end of the day, the brand name on your air conditioner’s metal cabinet is only a small part of the equation. What truly dictates your daily comfort, your monthly energy bills, and how long your system will last is the quality of the installation.
At Haven Air Conditioning, we are dedicated to providing the homeowners of Anaheim, Orange, Fullerton, Irvine, and the surrounding Orange County areas with expert, worry-free HVAC installations. Our friendly, certified professionals don’t believe in shortcuts. We perform detailed Manual J load calculations, use precision digital tools to calibrate every system to factory specifications, and back our craftsmanship with an unwavering attention to detail.
We want to give you complete peace of mind, taking care of your indoor comfort so you can simply relax in your home. Whether you are looking to replace an old system, upgrade your home’s ductwork, or need a professional second opinion on a recent setup, we are here to help.
Ready to experience the difference that expert craftsmanship makes? Contact us today to schedule a consultation or check out our expert AC installation services. Let’s keep your home perfectly cool for decades to come!