Why Installing Multiple Mini Splits is a Smart Solution for Whole-Home Comfort
Installing multiple mini splits is a powerful way to achieve efficient, flexible heating and cooling throughout your home without the expense and energy loss of traditional ductwork. For homeowners with aging central air or new additions, this solution offers independent temperature control for different zones, eliminating duct energy losses of up to 30% and providing the flexibility to heat or cool only the rooms you’re using.
Quick Answer: Key Steps for Installing Multiple Mini Splits
- Plan Your System – Calculate BTU needs, determine unit placement, and choose between single-zone or multi-zone systems.
- Mount Indoor Units – Install brackets on interior walls at least 6-7 feet high and drill angled holes for line sets.
- Position Outdoor Unit(s) – Place condenser(s) on level pads with proper clearance for airflow.
- Run Line Sets – Connect refrigerant lines, drain tubes, and control wires between units.
- Handle Electrical – Ensure dedicated circuits and hire a licensed electrician for final connections.
- Manage Refrigerant – Use pre-charged lines when possible; professional help is recommended for vacuuming and charging.
While much of the installation is DIY-friendly, critical steps like electrical wiring and refrigerant handling require professional expertise to ensure safety and optimal performance. Many Orange County homeowners find this zoned approach is the perfect answer for their comfort needs.
For more guidance on cooling solutions, check out our comprehensive air conditioning services. When you’re ready for expert installation, schedule your professional mini split consultation with Haven Air Conditioning.

Planning Your Multi-Unit Installation: Sizing, Placement, and System Choice
Proper planning is the most important step when installing multiple mini splits. Unlike central HVAC that cools or heats the entire house, mini splits allow you to create a customized comfort system with independent zones. This targeted approach eliminates the 30% energy loss common with leaky ductwork, leading to significant savings. Mini splits are also remarkably flexible, adapting to new home gyms, guest suites, or other spaces where a central system can’t keep up.

How to Properly Size Multiple Mini-Split Systems
Getting the sizing right is the foundation of an efficient system. Start with a BTU load calculation for each zone. A common rule of thumb is about 20 BTUs per square foot (e.g., a 300-square-foot room needs about 6,000 BTUs). However, this is just a starting point. Factors like ceiling height, insulation quality, window count, and sun exposure significantly impact your actual needs, especially during hot Orange County summers.
Incorrect sizing causes major issues. An oversized unit will “short-cycle” (turn on and off frequently), wasting energy, failing to dehumidify, and causing premature wear. An undersized unit will run constantly without reaching the target temperature, increasing energy bills and reducing comfort.
Also, consider the difference between nominal capacity (lab-tested rating) and actual capacity (real-world performance), which is affected by line length and climate. For a detailed guide, see our post on Proper Sizing for Home AC Split Mini Systems.
Determining Placement for Multiple Indoor Units
Strategic placement is key to performance. Follow these guidelines:
- Height: Mount indoor units at least six to seven feet high, respecting the manufacturer’s required clearance from the ceiling for proper airflow.
- Avoid Heat Sources: Keep units away from direct sunlight, lamps, or appliances that can trick the thermostat and cause overcooling.
- Create a Circulation Pattern: In large, open-concept spaces, position multiple units to create a gentle, circular airflow. Avoid placing them where they blow directly at each other.
- Specialty Spaces: For workshops or garages with inconsistent insulation, use multiple air handlers to prevent hot and cold spots. Ceiling fans can also help circulate air.
You can mix different types of indoor units on a single multi-zone system. Combine wall-mounted units with ceiling cassettes, floor-mounted units, or even concealed duct units to fit each room’s specific needs and aesthetics. For more placement strategies, read our article on Ductless AC Placement Maximizes Home Comfort.
Choosing Your System: Multiple Single-Zones vs. a Multi-Zone System
You must decide between installing several independent single-zone systems or one multi-zone system connecting multiple indoor units to a single outdoor condenser. This choice impacts installation, flexibility, and redundancy.
- Multiple Single-Zone Systems: These offer maximum redundancy, as each indoor unit has a dedicated outdoor unit. If one system fails, the others continue working. They are also highly flexible for future expansion and can have higher individual SEER (efficiency) ratings. The main drawback is the exterior clutter of multiple outdoor units and the need for separate electrical runs.
- A Single Multi-Zone System: This option is aesthetically cleaner, with only one outdoor unit. It’s often more cost-effective for three or more zones. The trade-off is a single point of failure: if the outdoor unit fails, all connected zones lose climate control.
Both approaches provide excellent Zone Control Benefits With Mini Split AC.
| Feature | Multiple Single-Zone Systems | Single Multi-Zone System |
|---|---|---|
| Outdoor Units | One outdoor unit per indoor unit (1:1 ratio) | One outdoor unit connected to multiple indoor units |
| Redundancy | High—if one outdoor unit fails, other zones keep working | Lower—if the outdoor unit fails, all zones are affected |
| Flexibility | Excellent for expansion and individual replacement | Good—can add indoor units up to capacity |
| Efficiency | Often higher SEER per unit | Very efficient when properly sized |
| Installation | More outdoor units, electrical runs, and wall penetrations | One main electrical run, cleaner exterior look |
| Aesthetics | Multiple outdoor units may clutter exterior | Single outdoor unit, but multiple line sets still visible |
| Long-Term Cost | Can become expensive with many zones | More cost-effective for multiple zones |
| Control | Each zone completely independent | Individual zone control from one outdoor unit |
Understanding Multi-Zone Condenser Types
Multi-zone systems use two main types of outdoor condensers:
- Multi-Port Condensers: These units have built-in ports where each indoor unit connects directly. They are straightforward and ideal for setups with two to four zones. However, they are limited by the number of ports, may have shorter line set limits, and can result in multiple visible lines on your home’s exterior.
- Branch Box Systems: A single, larger refrigerant line runs from the condenser to a central branch box (often in an attic or garage), which then distributes refrigerant to individual indoor units. This design offers greater flexibility for more zones, longer line sets, and a cleaner exterior look. While slightly more complex to install, it’s superior for larger homes or those with extensive zoning needs.
Your choice depends on the number of zones, distances, and aesthetic preferences. You can learn more about creating a zoned system.
A Step-by-Step Guide to Installing Multiple Mini Splits
With planning complete, it’s time for the hands-on work of installing multiple mini splits. While much of the physical installation is straightforward, precision is critical. Always follow your manufacturer’s instructions, as these steps are a general guide. For safety, especially with electrical and refrigerant work, hiring a professional is the smartest choice.
Before starting, gather your tools: the mini-split system components, mounting brackets, drill with a hole saw, level, tape measure, stud finder, wrenches (including a torque wrench), and safety gear. For refrigerant work beyond pre-charged lines, you’ll need a vacuum pump, gauges, and a flaring tool.

Step 1: Mount the Indoor Units (Air Handlers)
Using your placement plan, locate the wall studs for each indoor unit at least six to seven feet above the floor. Position the mounting bracket and use a level to ensure it is perfectly level—this is crucial for proper drainage. Secure the bracket to the wall with lag bolts into studs or heavy-duty anchors.
Next, use a hole saw (typically 2-3 inches) to drill a hole through the wall for the line set. Angle the hole slightly downward toward the exterior to ensure proper condensate drainage and prevent water from backing up into your home.
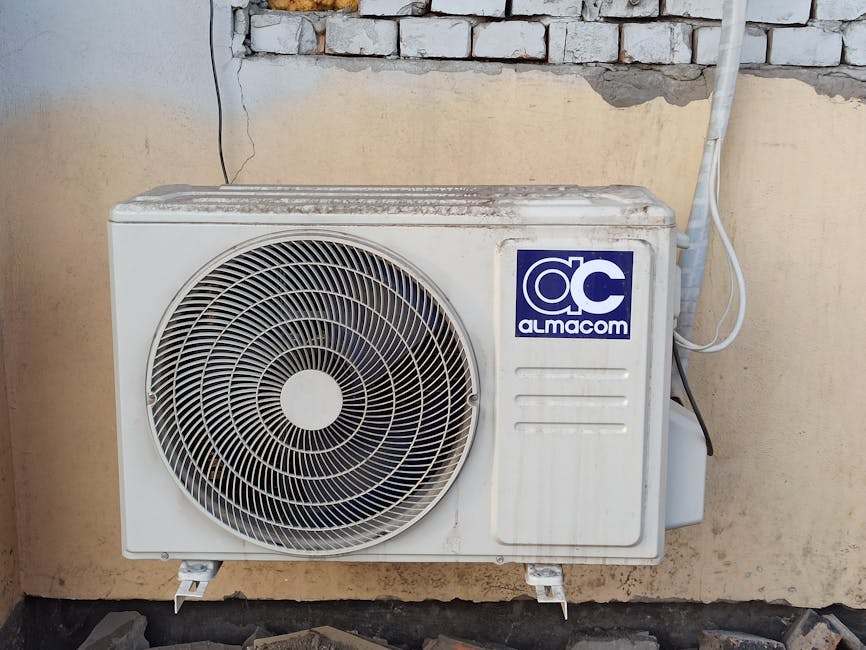
Step 2: Position and Secure the Outdoor Unit (Condenser)
The outdoor condenser needs a stable, well-ventilated location. For a ground mount, place the unit on a level concrete or composite pad to prevent corrosion and absorb vibration. Wall mounts are also an option where ground space is limited.
Regardless of the method, ensure the outdoor unit is perfectly level for proper operation. Follow the manufacturer’s clearance requirements for distance from walls and other obstructions to guarantee adequate airflow. Blocked airflow reduces efficiency and can cause overheating. Also, leave enough space for future maintenance access.
Step 3: Run and Connect the Line Sets and Drains
This step connects the indoor and outdoor units. For each indoor unit, bundle the two refrigerant lines, control wire, and condensate drain tube. Carefully feed the bundle through the wall hole, ensuring the drain tube remains at the bottom to maintain a downward slope.
Connecting the refrigerant lines requires precision. For pre-charged lines, connect the flared ends to the service ports. For traditional lines, you’ll need to cut and flare the tubing. In either case, use a torque wrench to tighten the flare nuts to the manufacturer’s exact specification to prevent leaks. Over-tightening can crack the flare, while under-tightening will cause leaks.
After connecting, insulate both refrigerant lines completely from the indoor to the outdoor unit to prevent energy loss and condensation. Finally, route the condensate drain tube away from your foundation, maintaining a continuous downward slope to a suitable discharge location. Repeat these steps for each indoor unit, double-checking every connection.
Critical Challenges: Electrical, Refrigerant, and Airflow
Beyond the mechanical steps, installing multiple mini splits involves critical challenges in electrical work, refrigerant handling, and airflow. These areas require specialized knowledge to ensure a safe, efficient, and long-lasting system. High-voltage electricity and pressurized refrigerant pose significant risks of injury, property damage, and environmental harm if handled improperly. For these reasons, we strongly recommend professional assistance for these final, critical steps.

Navigating the Electrical Requirements for Installing Multiple Mini Splits
Getting the electrical work right is non-negotiable for safety.
- Dedicated Circuits: Each outdoor unit requires its own dedicated circuit (usually 20-amp) from your electrical panel to prevent overloads.
- Voltage: Most systems use 220-volt power, though smaller single-zone units (under 12,000 BTU) may use 110-120 volts. Always check the manufacturer’s specifications.
- Disconnect Box: An outdoor disconnect box must be installed near each condenser. This is a code requirement that allows power to be safely cut for maintenance.
Due to the risks of shock and fire, all electrical work should be performed by a licensed electrician to ensure code compliance and safety. If you notice electrical issues later, see our guide on Warning Signs A Ductless AC Needs Attention.
The Essentials of Refrigerant Handling
Refrigerant handling is mission-critical and best left to certified professionals due to safety risks and environmental regulations.
- Pre-Charged Lines: Many DIY-friendly systems use these. Never cut pre-charged lines, as this illegally releases refrigerant.
- Vacuuming Lines: For systems without pre-charged lines, a vacuum pump must be used to remove all air and moisture. Any moisture left inside can form corrosive acids that destroy the system.
- Leak Testing: Before charging, lines must be pressure-tested with nitrogen to find and fix any leaks, which would otherwise reduce efficiency and damage the compressor.
- Proper Charging: The system must be charged with the exact amount of refrigerant specified by the manufacturer. Too much or too little will cause damage and poor performance.
This process requires specialized tools and expertise, which is why professional assistance is essential for system longevity and safety.
Ensuring Proper Airflow When Installing Multiple Mini Splits
In large, open spaces, multiple indoor units must work together. The goal is to create a thoughtful circulation pattern, not have units blowing directly at each other, which causes drafts and inefficiency. Position units on opposing walls or in corners to establish a gentle, circular flow that distributes conditioned air evenly.
Ceiling fans are a valuable supplement when installing multiple mini splits. They help circulate conditioned air more effectively without making the system work harder, improving comfort and lowering energy bills. For more strategies on optimizing airflow, see our guide to Improve Air Distribution Mini Split AC.
Frequently Asked Questions about Multi-Unit Mini Split Installations
We talk with homeowners every day about installing multiple mini splits, and certain questions come up again and again. Let’s explore the most common concerns we hear, with straightforward answers that’ll help you understand your system better.
How does the length of refrigerant lines affect performance?
Yes, line length affects performance. Longer lines can lead to minor efficiency loss as the compressor works harder. However, mini splits are designed for this. The key is to stay within the manufacturer’s maximum line set length (typically 50-150 feet) to avoid performance issues and voiding your warranty.
Longer runs often require an additional refrigerant charge, a precise calculation that should be handled by a professional. An incorrect charge can damage the compressor. For very long distances, a second outdoor unit may be more efficient.
What are the maintenance differences between multiple single-zone systems and a single multi-zone system?
Maintenance differs slightly between system types:
- Multiple Single-Zone Systems: You have more outdoor units to maintain (cleaning coils, checking connections), but benefit from redundancy if one unit fails.
- A Single Multi-Zone System: Outdoor maintenance is consolidated to one unit, but if it fails, all zones are affected.
For any system, routine maintenance is key: clean indoor filters every 1-2 months, ensure condensate drains are clear, and keep outdoor coils free of debris. An annual professional check-up is the best way to catch small issues early. Learn more from our guide on Warning Signs A Ductless AC Needs Attention.
Can I use multiple mini splits in a large open space like a workshop?
Yes, using multiple mini splits is an excellent strategy for large, open spaces like workshops. A single unit often creates hot and cold spots, while installing multiple mini splits ensures even temperature distribution.
Position the units to create a complementary, circular airflow pattern rather than blowing at each other. This provides consistent comfort and flexibility, allowing you to heat or cool only the areas you’re using, which saves energy. For more tips, see our article on how to Improve Air Distribution Mini Split AC.
Conclusion: Enjoy Your New Zoned Comfort System
By installing multiple mini splits, you’ve invested in a fundamental upgrade to your home’s comfort. You now have total control over your home’s temperature on a room-by-room basis, ending thermostat arguments and wasted energy.
The benefits include significant long-term energy savings of up to 30% compared to central air by eliminating duct losses and zoning your comfort. This is a smart choice for both your wallet and the environment.
While this guide covers many DIY steps, critical tasks like electrical work and refrigerant handling require professional expertise for safety and peak performance.
For expert advice and professional mini split installation in the Orange County area, trust the certified team at Haven Air Conditioning. We ensure your new system is installed correctly and efficiently, backed by our trademark customer service.
Ready to experience personalized climate control? Schedule your professional Mini Split AC Installation today and enjoy the comfort and savings you deserve!