Why Clean Coils are the Secret to a Cool, Efficient Home
AC coil cleaning is a crucial maintenance task for your air conditioning system. Your AC has two sets of coils: evaporator coils inside that absorb heat and condenser coils outside that release it. When these coils get dirty, your entire system suffers.
Dirty coils can reduce your AC’s efficiency by up to 30% and increase energy consumption by up to 40%, leading to higher electric bills and a strained system. Clean coils are the foundation of an efficient, reliable cooling system.
Quick AC Coil Cleaning Guide:
- Turn off power at the thermostat and circuit breaker.
- Locate coils: Evaporator (indoor) and condenser (outdoor).
- Clean evaporator coils: Use a soft brush and no-rinse cleaner.
- Clean condenser coils: Remove debris, apply foaming cleaner, and rinse from the inside out.
- Frequency: At least once per year.
- When to call professionals: For heavy mold, damaged fins, or electrical issues.
While many homeowners can DIY this task, professional cleaning is recommended for heavily soiled coils or if you’re uncomfortable with the process, ensuring the job is done safely and thoroughly.

The Unseen Enemy: Signs, Risks, and Rewards of Coil Maintenance
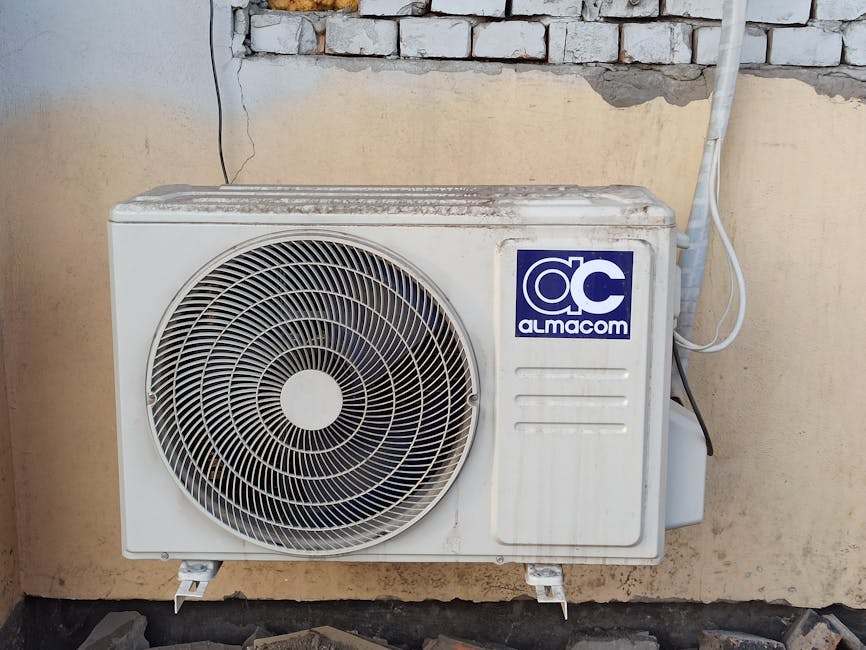
If your AC is running but your Orange County home isn’t cool, the culprit could be dirty coils. Your system’s evaporator coils (indoor) and condenser coils (outdoor) work together to transfer heat. When they’re clogged with dirt, dust, and grime, the whole system struggles.
This leads to reduced efficiency, higher energy bills, and increased system wear and tear. Dirty coils can also harbor mold and bacteria, harming your poor indoor air quality, and can even cause ice buildup on the evaporator coils. Fortunately, regular AC coil cleaning reverses these issues, bringing back increased comfort and cost savings.
Signs Your AC Coils Need Cleaning
Your AC will give you warning signs when its coils need cleaning. Look out for these red flags:
- Reduced cooling: The AC runs constantly, but your home stays warm because the coils can’t transfer heat effectively.
- Higher utility bills: Clogged coils force the system to work harder and run longer, increasing energy consumption.
- Ice on coils: Restricted airflow over dirty evaporator coils can cause them to freeze. Turn off your AC immediately if you see ice.
- Musty odors: Dirty, damp coils are a breeding ground for mold and bacteria, which can create unpleasant smells.
- Visible dirt: A visual inspection of your outdoor unit may reveal a buildup of dust, leaves, and other debris on the fins.
The High Cost of Neglect
Ignoring dirty coils leads to more than just discomfort; it can cause expensive problems.
- System breakdowns: Constant stress on components, especially the compressor, increases the risk of failure and premature replacement.
- Voided warranties: Many manufacturers require regular maintenance, including coil cleaning, to keep your warranty valid.
- Increased repair costs: Preventive cleaning is a small investment compared to the high cost of repairing or replacing major components damaged by neglect.
The Benefits of a Deep Clean
Giving your coils a deep clean provides immediate and long-lasting rewards.
- Improved energy efficiency: Clean coils transfer heat effortlessly, allowing your system to operate as designed without straining.
- Lower electricity bills: An efficient system consumes less power, leading to noticeable savings on your monthly bills.
- Extended HVAC lifespan: Regular AC coil cleaning reduces stress on components, helping your entire system last longer.
- Better indoor air quality: Eliminating the buildup of mold, bacteria, and allergens on coils means cleaner air circulating through your home.
- Consistent cooling performance: Enjoy reliable, even cooling without hot spots, keeping your home comfortable.
Preparing for the Job: DIY vs. Professional AC Coil Cleaning
Deciding between DIY AC coil cleaning and calling a professional depends on your comfort level, tools, and the condition of your coils.

DIY can be a satisfying, money-saving project if you’re comfortable working with electrical equipment. However, for heavily soiled coils or if you prefer an expert touch, professional cleaning ensures the job is done safely and thoroughly with specialized tools.
| Factor | DIY AC Coil Cleaning | Professional AC Coil Cleaning |
|---|---|---|
| Cost | Low (cost of tools/cleaner) | Higher (service fee) |
| Time | Your time and effort | Minimal time commitment for you |
| Difficulty | Moderate to High (requires attention to detail) | Low (handled by experts) |
| Thoroughness | Variable (depends on skill and access) | High (trained technicians, specialized equipment) |
| Risks | Electrical shock, coil damage, improper cleaning | Minimal (trained pros, proper safety protocols) |
What matters most is that the cleaning is done correctly and safely. At Haven Air Conditioning, we support successful DIYers and are ready to help if you need us.
Essential Tools and Materials
Having the right tools is key for a successful AC coil cleaning project. Here’s what you’ll need:
- Soft brush: To gently remove dirt from delicate coil fins without causing damage.
- Fin comb: A simple tool to straighten any bent fins and restore proper airflow.
- Screwdriver or nut driver: To remove access panels.
- Shop vacuum: For removing loose debris.
- Garden hose with spray nozzle: For gently rinsing outdoor coils.
- Safety gear: Safety goggles and chemical-resistant gloves are essential.
- Coil cleaner: A product specifically designed for HVAC coils.
Best Types of AC Coil Cleaners
Choosing the right cleaner is crucial for your AC coil cleaning project. Here are your main options:
- Foaming cleaners: These expand to penetrate deep into fins and lift stubborn dirt, making them great for heavily soiled outdoor coils.
- Non-foaming cleaners: These liquid sprays are easier to control and rinse, suitable for lighter cleaning on both indoor and outdoor coils.
- No-rinse evaporator cleaners: Designed for indoor coils, these cleaners break down dirt and drain away with the system’s natural condensation, eliminating the need to rinse indoors.
- Mild detergent: A mix of gentle dish soap and warm water can work in a pinch, but it requires thorough rinsing to prevent residue.
Important: Avoid harsh chemicals like bleach or highly acidic detergents, as they can corrode and damage your coils. Always use products specifically made for HVAC systems.
Essential Safety Precautions for AC Coil Cleaning
Safety is paramount during any AC coil cleaning project. Follow these precautions:
- Turn off the power: This is the most critical step. Turn off the AC at the thermostat and then shut off the power at the circuit breaker for the AC unit. Double-check that the power is off before you begin.
- Handling chemicals: Always wear safety goggles and chemical-resistant gloves. Read the cleaner’s instructions and ensure you have adequate ventilation, especially when working indoors.
- Protecting fins: The aluminum fins on the coils are delicate. Avoid using high-pressure water (no pressure washers), wire brushes, or aggressive scrubbing, as bent fins will restrict airflow.
- Proper ventilation: Open windows and doors when cleaning indoor coils. When working outside, be mindful of wind direction to avoid blowback of debris and cleaning solutions.
How to Clean Your Indoor Evaporator Coils
The indoor evaporator coil is often out of sight, tucked away in your air handler or furnace. But don’t let its hidden location fool you – it gets just as dirty as its outdoor counterpart, if not more so, especially if you’re not diligent about changing your air filters. Cleaning these coils is crucial for efficient heat absorption and maintaining healthy indoor air quality.

Step 1: Accessing the Evaporator Coil
Accessing the evaporator coil might seem daunting, but it’s usually straightforward.
- Locating the Indoor Unit: Your evaporator coil is typically located in your indoor air handler or furnace, often in the ductwork directly above the furnace. It might be in a vertical or horizontal configuration.
- Removing the Access Panel: Most air handlers have an access panel that provides entry to the evaporator coil. Consult your unit’s owner’s manual if you’re unsure where it is or how to open it. You’ll likely need a screwdriver or nut driver to remove screws or fasteners. Once the panel is off, you’ll see the A-frame or slab-style coil.
- Inspecting for Dirt and Mold: Take a moment to inspect the coil. You’ll likely see a layer of dust, lint, and possibly even mold if it’s been a while since its last cleaning. Also, check the drain pan beneath the coil for standing water, slime, or debris. This pan collects the condensation that drips off the coil, and it can get pretty nasty!
Step 2: Cleaning the Coil Surface
Now for the actual cleaning! Remember to be gentle, as these coils are delicate.
- Using a Soft Brush: Carefully use a soft-bristled brush to gently sweep away any loose dirt, dust, and debris from the coil fins. Brush in the direction of the fins to avoid bending them.
- Vacuuming Loose Debris: Use your shop vacuum with a brush or crevice attachment to carefully vacuum up the dislodged debris from the coil surface and the surrounding area. Pay attention to the bottom of the air handler where debris might accumulate.
- Applying No-Rinse Evaporator Coil Cleaner: Generously spray a no-rinse evaporator coil cleaner directly onto the coil surface. Ensure thorough coverage, especially in areas with heavy buildup. These cleaners are designed to foam up, penetrate the dirt, and then gradually drip down into the condensate drain pan with the natural condensation. Follow the cleaner’s instructions for dwell time.
- Cleaning the Condensate Drain Pan: While the coil cleaner is working, inspect the condensate drain pan. If there’s standing water, use your shop vacuum (in wet mode) to remove it. If you see slime or algae, use a mixture of warm water and a little bleach (or a specialized drain pan cleaner) to clean the pan thoroughly. You can also pour a cup of distilled vinegar down the condensate drain line to help clear any clogs and prevent future growth.
- Reassembly: Once the coil cleaner has done its job and the coils appear clean, you can reattach the access panel. Ensure all screws are secure. We recommend leaving the unit off for at least an hour or two to allow any remaining moisture to evaporate before restoring power.
How to Clean Your Outdoor Condenser Coils
Your outdoor condenser unit is a magnet for debris like leaves, grass clippings, and pollen. Cleaning these coils is straightforward but requires a gentle touch to protect the delicate fins.

Step 1: Clearing the Area and Removing Debris
First, prepare the area around your outdoor unit for cleaning.
- Clear leaves and grass: Remove any leaves, grass clippings, twigs, and other debris from around the unit. Trim back any surrounding bushes or plants to ensure at least two feet of clearance for proper airflow.
- Remove the top grille and fan (optional): For better access to the inside of the coils, you can carefully unscrew and remove the top grille and fan assembly. Be gentle with the fan wires. If you’re not comfortable with this step, you can still clean the coils effectively from the outside.
- Vacuum debris from inside the unit: Use a shop vacuum to remove any accumulated leaves and dirt from the bottom of the unit’s interior.
Step-by-Step AC Coil Cleaning for Your Outdoor Unit
Now it’s time to clean the condenser coils.
- Apply foaming coil cleaner: Spray the cleaner generously on all sides of the coils, ensuring it penetrates deep into the fins. If you removed the fan, spray from the inside for the best coverage.
- Let the cleaner work: Allow the cleaner to sit for the time specified in the manufacturer’s instructions (typically 5-10 minutes). The foam will expand and lift away grime.
- Rinse from the inside out: This is the most effective rinsing method. Use a garden hose on a gentle spray setting to rinse the coils from the inside, pushing dirt and cleaner outwards. Work from top to bottom until the coils are clean. Do not use high pressure, as it will bend the fins.
- Use a fin comb to straighten fins: After rinsing, inspect the fins for any bends. Use a fin comb to gently straighten them to ensure proper airflow.
- Reassemble and restore power: Carefully reassemble the unit, securing the top grille and fan if you removed them. Restore power at the circuit breaker, wait a few minutes for the unit to air-dry, and then turn it on at the thermostat.
Frequently Asked Questions about AC Coil Maintenance
As experts in AC coil cleaning in the Greater Orange County Area, we hear a lot of great questions from homeowners. Here are answers to the most common ones.
How often should I clean my AC coils?
As a general rule, you should clean your AC coils at least once a year, ideally in the spring before the cooling season begins.
However, you may need to clean them more often depending on several factors:
- Environment: Homes in dusty areas, near construction, or with high pollen counts will need more frequent cleaning.
- Pets: Pet hair and dander can clog coils quickly, so pet owners should inspect their coils more regularly.
- Usage: If your AC runs constantly during hot summers, it will accumulate dirt faster.
- Air Filters: Changing your air filters every 1-3 months is crucial for keeping coils cleaner for longer.
Always check your manufacturer recommendations for specific maintenance schedules to keep your warranty valid.
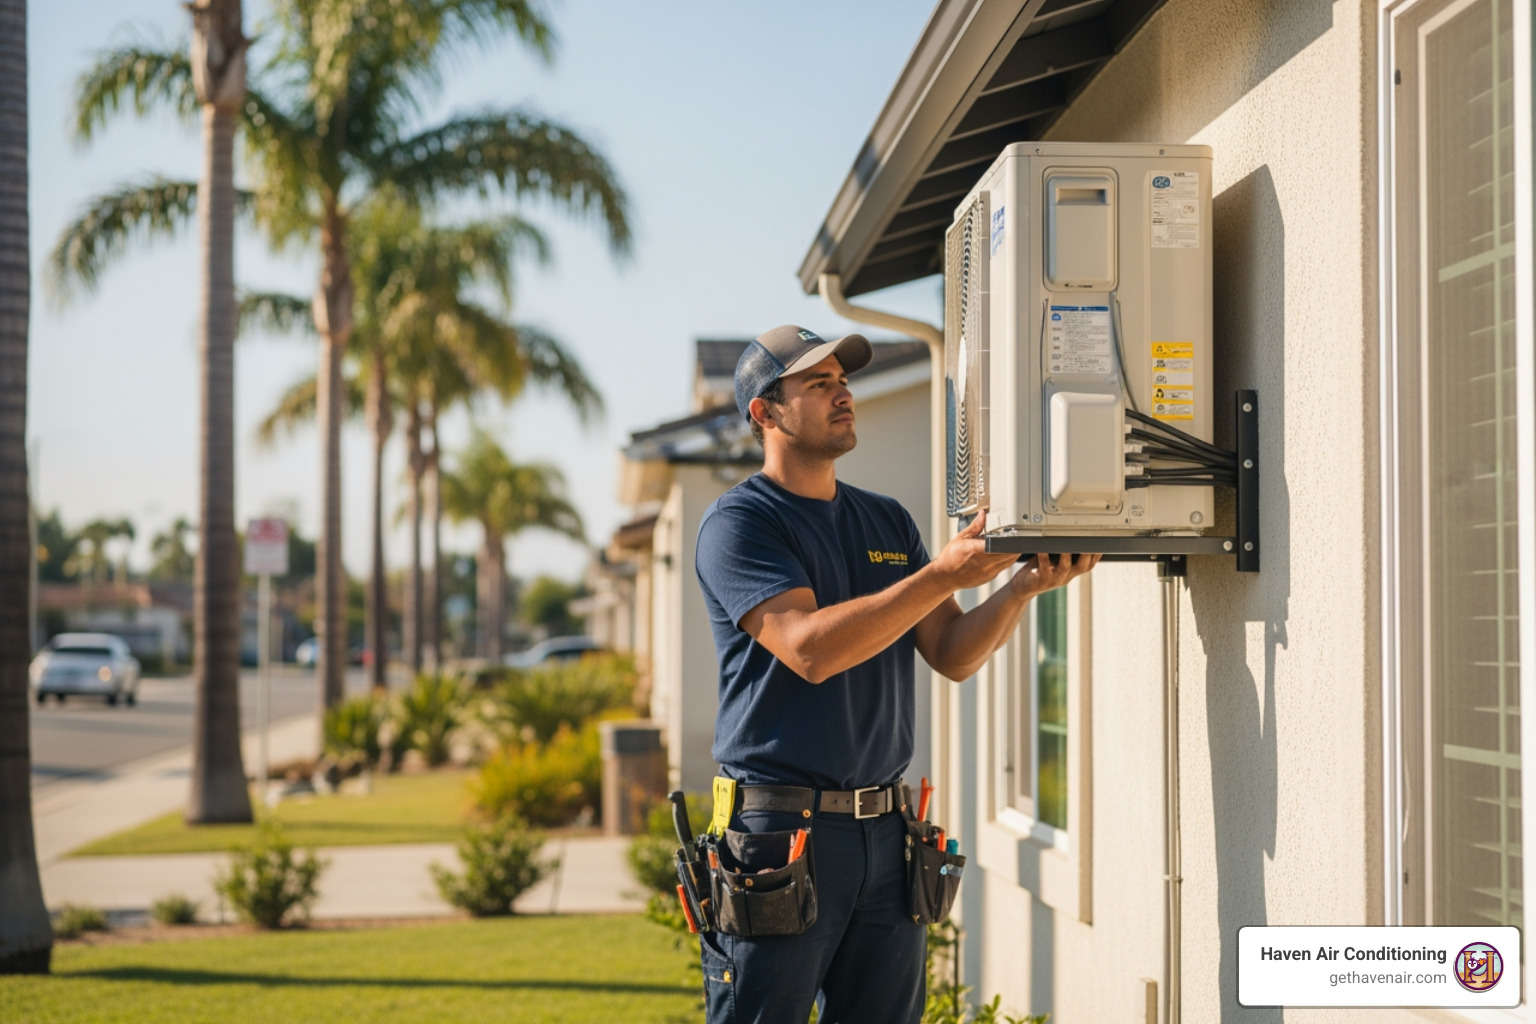
When should I call a professional instead of doing it myself?
While DIY cleaning is possible, you should call a professional in these situations:
- Heavy mold growth: Professionals have the right equipment and cleaners to safely remove mold without spreading spores through your home.
- Significant fin damage: If coils are badly bent or damaged, a technician may be able to repair them with professional tools.
- Refrigerant leaks: Signs like hissing sounds or ice on refrigerant lines require immediate professional attention, as refrigerant handling is regulated.
- Electrical issues: For your safety, any electrical problems should be handled by a trained professional.
- Lack of confidence or tools: If you’re unsure or don’t have the right equipment, a professional AC coil cleaning ensures the job is done correctly and can help spot other potential issues, especially on older units.
Is it better to clean or replace my AC coils?
The decision to clean or replace coils depends on their age and condition.
- Clean when coils are dirty but structurally sound, especially on newer units (under 8 years old). Cleaning is a cost-effective way to restore performance.
- Replace when coils have significant corrosion, widespread physical damage, or refrigerant leaks that cannot be repaired.
From a cost perspective, replacing a coil on an older unit (8-10+ years) can be expensive. In this case, it may be more financially sensible to invest in a new, more efficient AC system. The best course of action is to get a professional assessment. A technician can evaluate your system and provide an honest recommendation on whether to clean, repair, or replace.
Keep Your Cool with Clean Coils
You now have a complete guide to AC coil cleaning. This essential maintenance task is about more than just equipment—it’s about creating a comfortable, efficient, and healthy home.
Regular cleaning delivers significant benefits: lower energy bills, consistent cooling, and cleaner air. This proactive care prevents costly breakdowns, extends your system’s life, and ensures your family’s comfort during hot Orange County summers.
While DIY cleaning is an option, professional service shines when you need an expert touch or have heavily soiled coils. At Haven Air Conditioning, our certified technicians have the tools and experience to perform a thorough AC coil cleaning, protecting your investment and comfort.
Whether you do it yourself or call us for help, taking action is what matters. Your comfort and your wallet will thank you.